Getting Started with Rowform
Welcome to Rowform — a fast, modern form builder designed for speed and SEO. This guide will walk you through creating your first form in under five minutes.
Creating Your Account
- Go to app.rowform.io and click Sign Up.
- You can sign up with:
- Google — One-click signup using your Google account. You’ll land on your Dashboard immediately.
- Email & Password — Enter your details and we’ll send you a verification link. After clicking the link, come back and hit “I’ve verified my email — Sign me in” to access your Dashboard. You can also resend the verification email if needed.
Your Dashboard
The dashboard is your home base. From here you can:
- View all your forms at a glance.
- Search for forms by title.
- Create new forms, import existing ones, or generate forms with AI.
- Switch between workspaces.
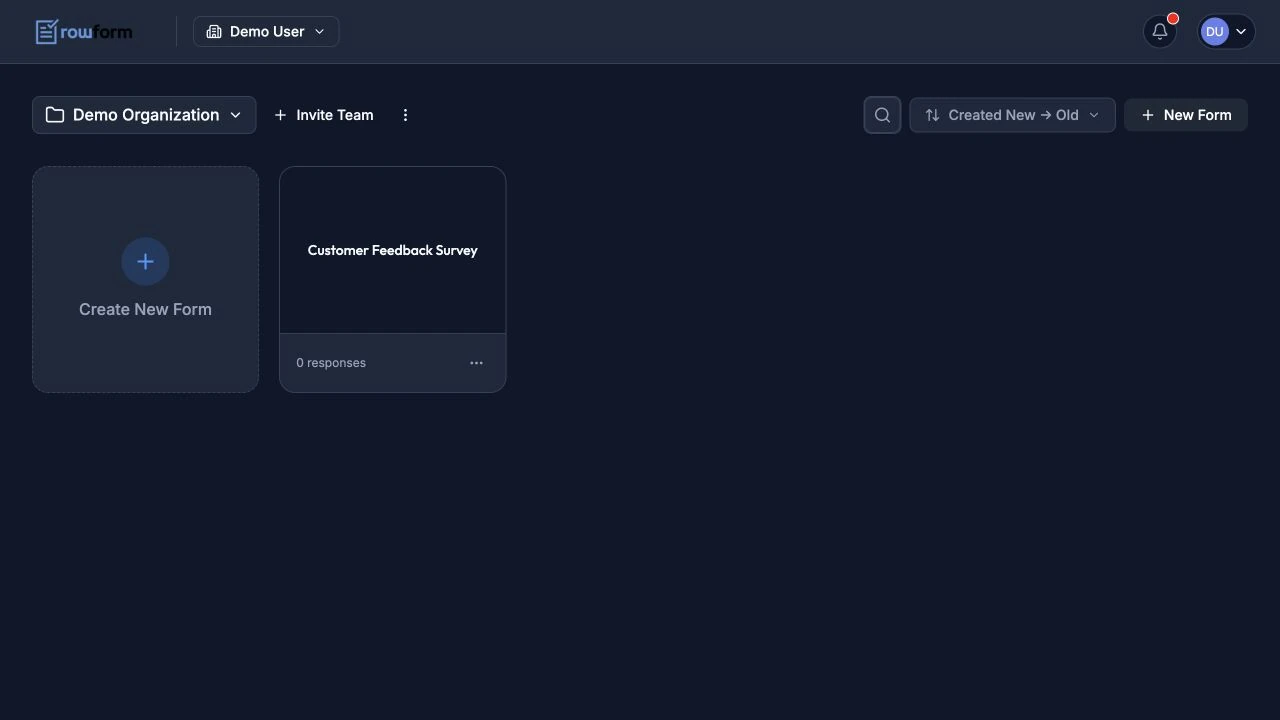
Create, find, and organize forms from the dashboard.
Creating Your First Form
Click New Form in the top-right corner of your dashboard. The Create with AI screen opens by default. Describe the form you need, open More options if you want to set a question count or target audience, then click Generate form.
Rowform shows a proposal before creating the form. Choose Reject to revise your prompt, or Accept and create form to add the form to your workspace and open it in the Builder.
To use a different starting point, look under Or start another way:
| Option | Description |
|---|---|
| Start from blank | Begin with a blank form and add blocks one by one. |
| Pick a template | Browse the template library and preview a starting point. |
| Import from Typeform | Paste a public Typeform URL to import its questions and structure. |
| Import from Google Forms | Paste a Google Forms URL to import its questions and sections. |
| Import from Paperform | Paste a public Paperform URL to convert its questions and choices. |
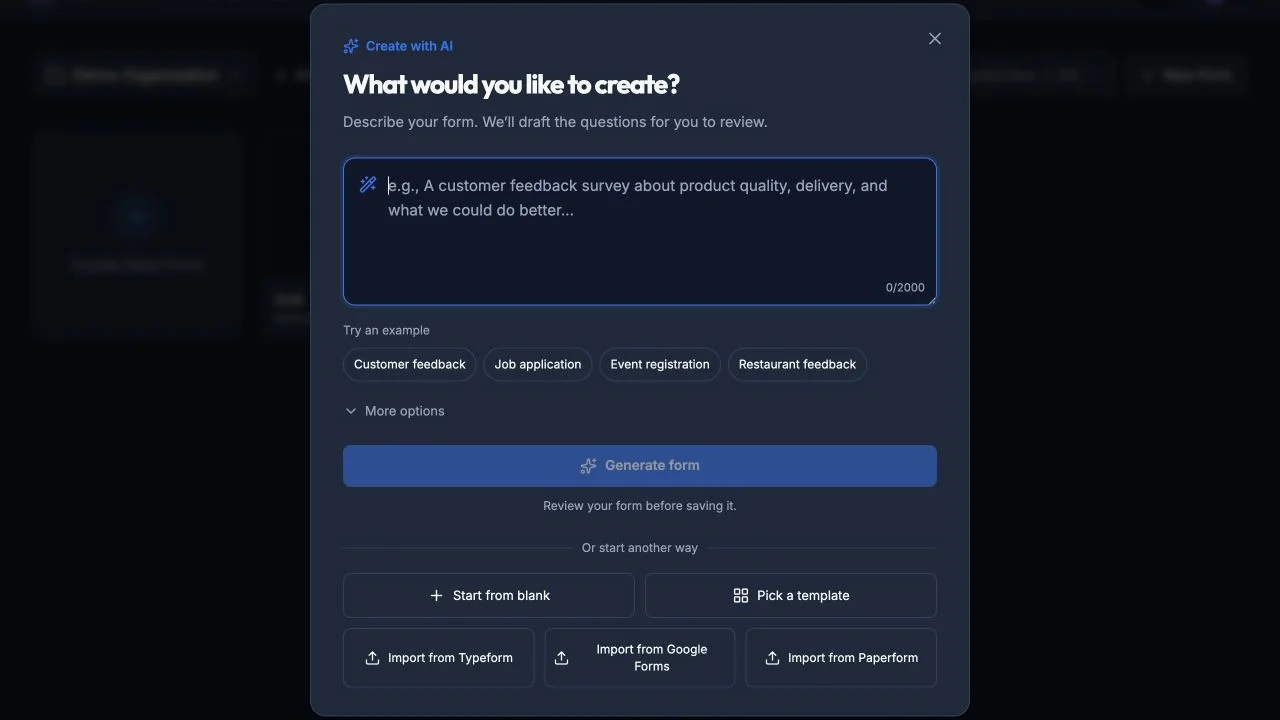
Describe a form for AI, or choose another starting route.
A Quick Tour of the Form Builder
Once you create a form, you’ll enter the Builder — the main editor. Here’s what you’ll see:
- Left Sidebar — Your list of blocks. Drag and drop to reorder them.
- Center Canvas — A live preview of the currently selected block.
- Right Panel — Properties and settings for the selected block.
- Navigation — Switch between Build, Integrate, Settings, Share, and Results. Use the builder toolbar for Design, Logic, Translate, device preview, version history, and preview.
- AI Composer — Describe changes in plain language from the field along the bottom of the canvas.
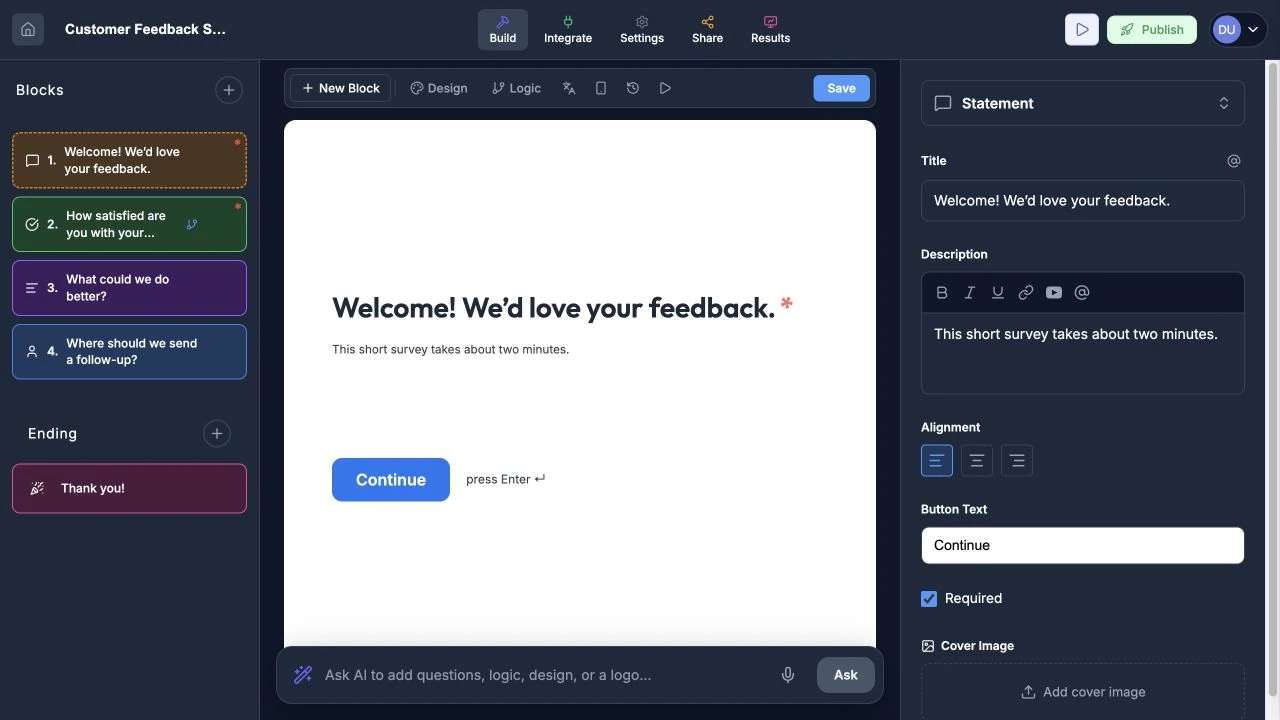
The builder keeps structure, preview, and properties visible together.
Adding Your First Block
- Click New Block in the builder toolbar.
- Choose a block type from the menu (e.g., Short Text, Single Select, Star Rating).
- Type your question text in the Properties panel.
- Configure options in the right panel (required, placeholder text, etc.).
- Repeat to add more blocks.
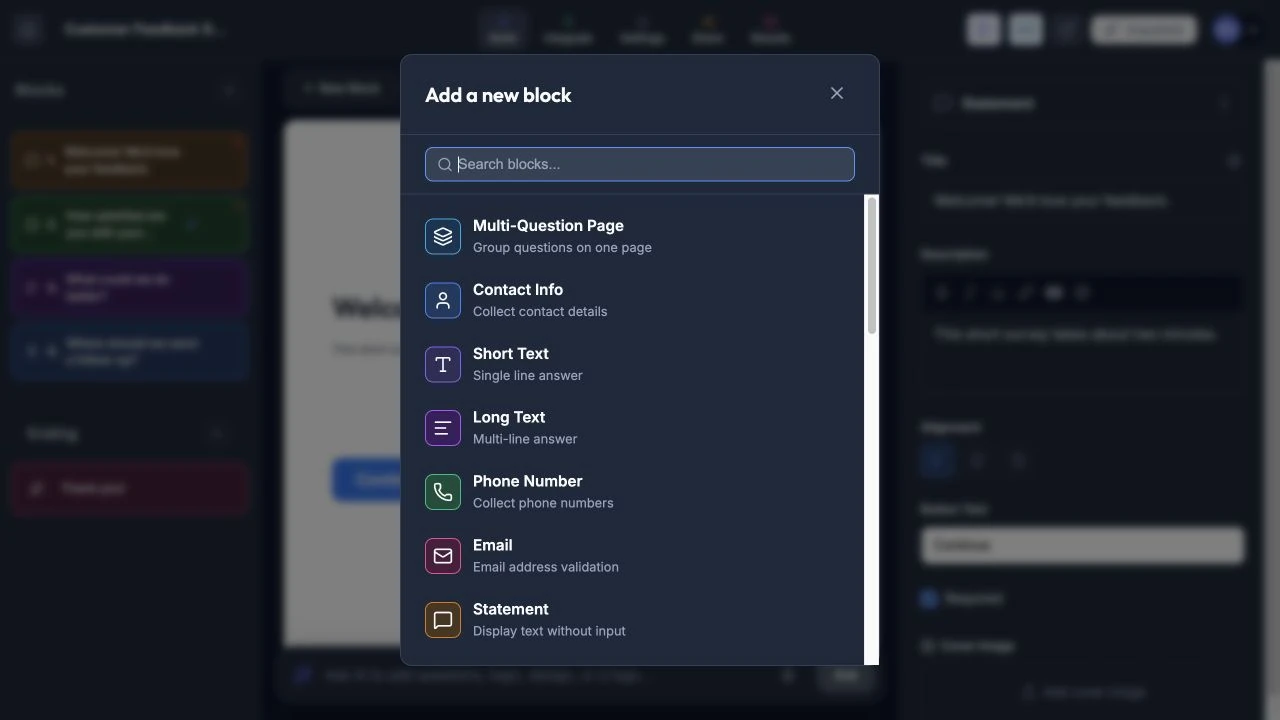
Select a block type to add it to the form.
Publishing Your Form
- Click Publish in the builder header.
- Open Share in the top navigation.
- Copy the shareable link or use one of the sharing actions.
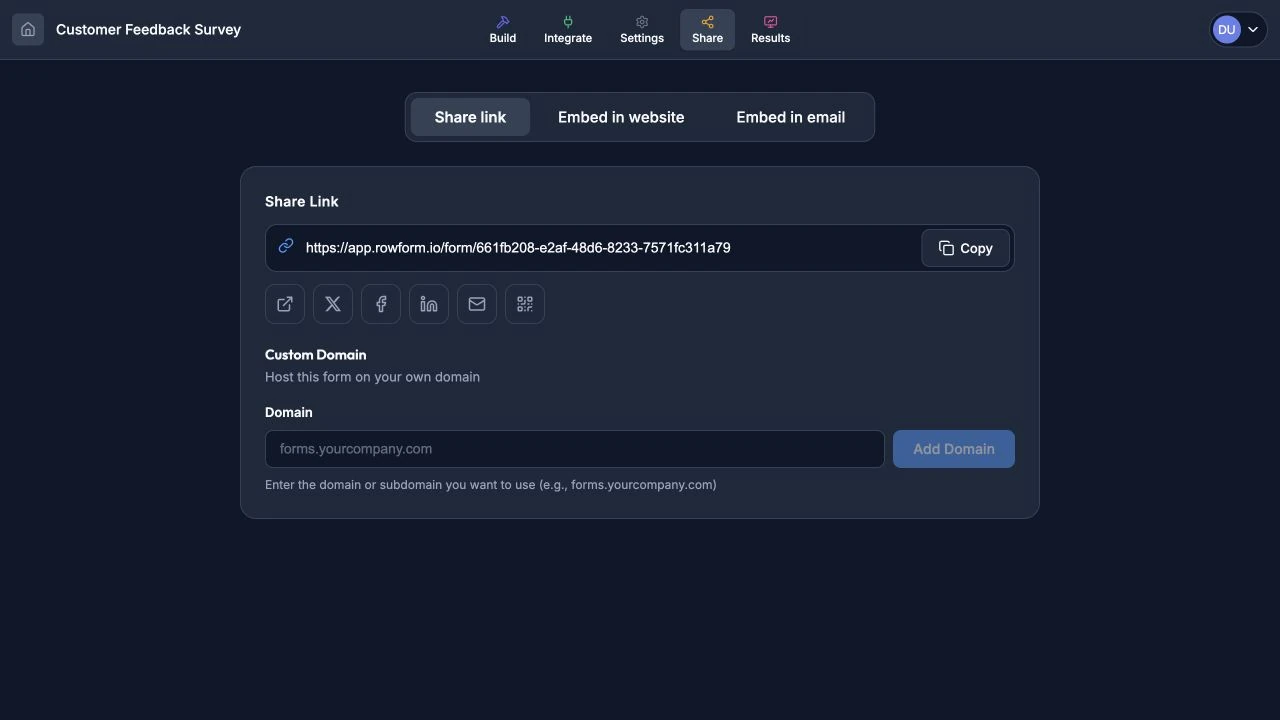
A published form gets a public link and sharing actions.
That’s it — your form is live and collecting responses.
Next Steps
- Question Types — Learn about the available block types.
- Design & Theming — Customize colors, fonts, and branding.
- Logic & Branching — Add conditional logic to your forms.
- Viewing Responses — See and export your form data.